Upgrading Icom CM-x battery packs with Li-Ion/Li-Po cells

To support my pile of Icom IC-H16Ts I decided to upgrade my original Ni-Cd packs to newer cells.
Keep in mind that the standby current of radios like this is effectively constant current; the radio will pull around the same current at 5 V as at 14 V. Because of this it's important to decide what usage you want to optimize for; a long standby time will favour lower voltage/high amp-hour whereas high duty cycle operations might benefit more from a higher pack voltage (higher voltage generally increases output power a bit).
The H16T can operate reasonably well from 5-15 V, a fairly wide range for a radio for this era. Icom supplied battery packs from 7.2-14 V, I've tested it down to 5 V which is around where the squelch will open permanently. For Li-Ion packs, 2-3 cells can be used; a 4S pack would have a somewhat excessive peak voltage when fully charged.
All the battery packs are easy to open and fairly simple to modify.
You'll likely need some foam to take up any slack and to prevent rattling, I used some foam from whatever packing materials I had left over. There's really not very many requirements here.
The screws used in these packs are M2x5 or so for the bottom screws (some kind of low profile head preferred, DIN912 is a little tall for this).
Top cover screws are self tapping 2mm or so with JST/Philips heads. I found that M2 screws can be used here if you lose the originals.
Safety
Li-Ion packs can be dangerous if shorted or charged incorrectly, if you don't know that then you should probably find someone that does and ask them to do this for you.
If you don't have the original terminal covers for the batteries you modify then you'll have to make some, the terminal design was bad enough with Ni-Cads and without a functioning BMS and Li-Po packs they will probably weld whatever you drop on them.
The covers are simple plastic sheets with the following dimensions: 24.9⨉58⨉0.5mm.
When paralleling cells up, make sure that they're at least close in voltage before making the connection; ideally you should run a full discharge/charge cycle to check the capacity of each cell to match them properly.
I prefer to do this with cell-phone/camera type Li-Po packs since they almost always come with internal protection and are designed for low current use.
Charging
To charge the converted packs the best way to do this is to use a standard RC battery pack charger, these support both fast and slow charge, as well as balance charging.
Imax B6 clones are readily available at low cost and work reasonably well.
Keep in mind that you definitely can't charge 14500s and small Li-Pos at the ridiculous charge current used for RC car packs, check the cell specifications if available or use 1-2x the capacity at most.
You may need to increase the charge-timeout in your controller to charge the packs properly at reasonably low currents; the default seems to be 120 minutes while a 0.5 A charge would take over 240 minutes for the CM-5 pack I built.
Charging Plugs
I decided to use balance charging for all these packs despite using BMSes, this allows easier initial matching and provides simple differentiation by using different plugs for each pack voltage.
I use a modified balance connection where there's no separate charge output wire, a slightly modified cable can be used to break out the pack ends to a standard T connector.
To fit the connector, which isn't designed for panel mounting, a 3D-printed bracket was designed to fit into an area where the original 2,1mm charging jack would be on certain cells.
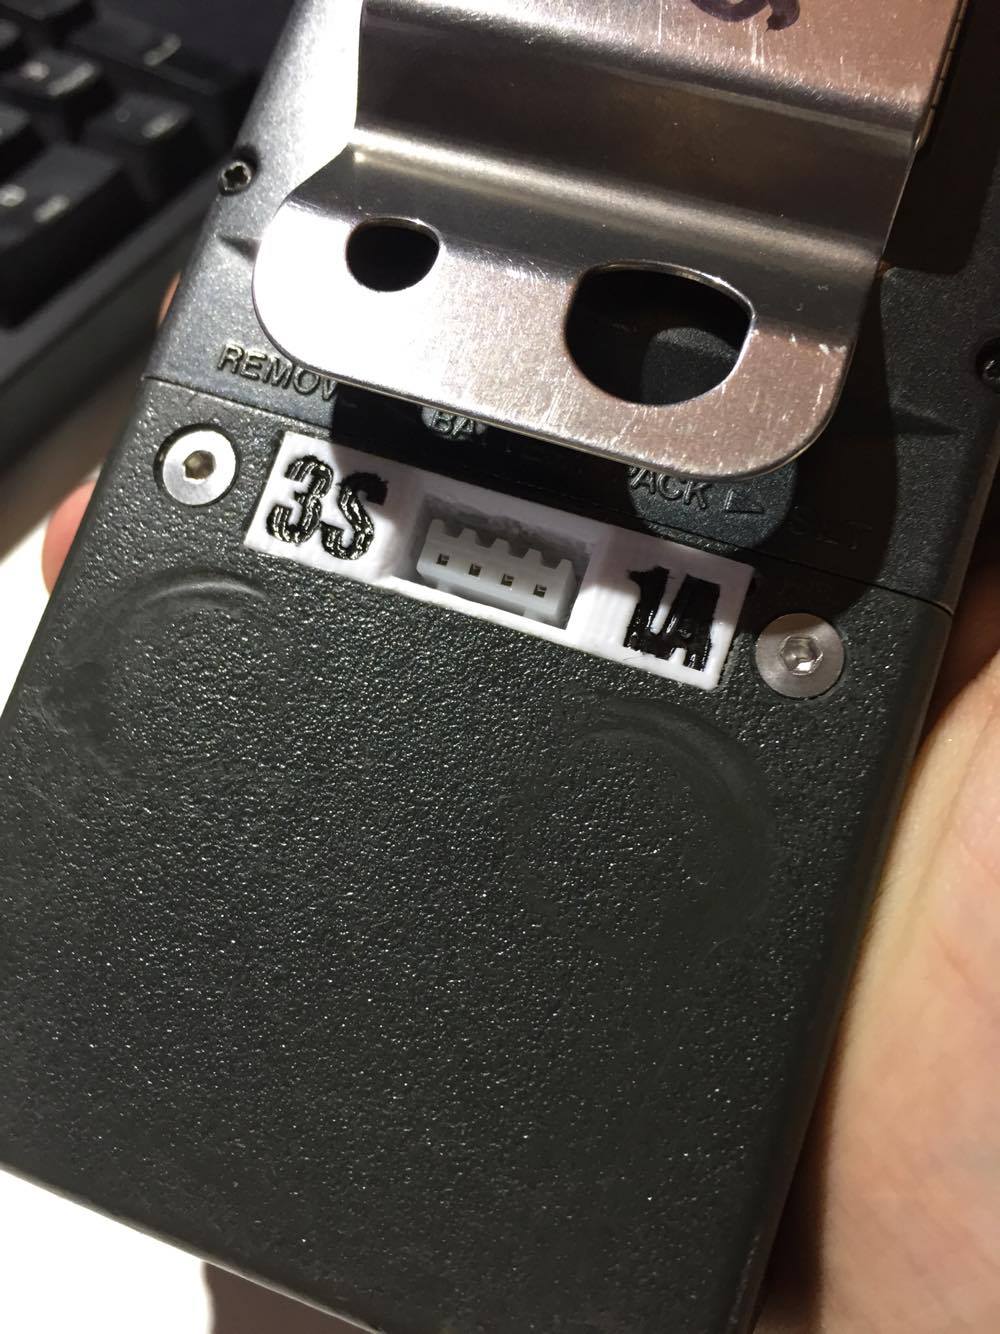
A 1.6mm mill but was used on a Proxxon X-Y stage to machine out the 35x9 mm area that the sticker+jack covered up. With some light filing the 3D print seats very nicely. The two M3 screws on the side screw into brass inserts in the bracket, the holes were drilled after installing the bracket using a transfer punch + manual counter sinking.
The JST-XH plugs snap in from the back using the normal retention features of the plug, then it's fixed more permanently using Loctite 403/480, and then covered with epoxy to permanently secure it.
When properly installed the bracket face and screws are flush with the battery pack exterior and it allows the use of a standard female JST connector that would otherwise be difficult to panel mount like this.
CM-2, small battery
The CM-2 battery is 7.2 V/240 mAh, there's two simple solutions here:
There's enough room to comfortably fit two standard AA battery holders in one half of the shell, this leaves plenty of room for a BMS board + a balance charge connector. There is technically enough room for 4x14500 cells but that would leave no room for the charge connector and BMS. Capacity is up to 800 mAh (14500s top out at around 800 mAh; don't trust eBay sellers selling anything larger).
Another solution that gives 1080 mAh is to use 802040 (8⨉20⨉40 mm) 540 mAh Li-Po packs; these come with internal protection so an external BMS is only required if you want to use a non-balance charger. This solution is more expensive at around $12 for 5 of the cells.
I built mine with the Li-Po packs in a 2⨉2 configuration to give 1080 mAh. This still left plenty of room for wiring.
Some packing foam was used to prevent rattling here.
CM-5, medium battery
The CM-5 battery was around 400 mAh originally, I originally built one of these packs as a 3S 14500 based pack but found the standby time to be inadequate. I rebuilt it as a 2S/2.4 Ah pack using Li-Po cells.
The bottom part of the pack has room for 4⨉603450 (6⨉34⨉50 mm) Li-Po packs, each rated for 1200mAh. These are connected as 2x2 to give a 7.4 V/2.4 Ah nominal pack. Protection is internal to each cell so no BMS was used.
There's enough depth to the pack that around 6mm of foam was needed depth-wise to fit everything, while the width (50mm) is about the largest that can fit without removing the bottom screw supports.
If you can find them, slightly thicker cells could be used for even higher capacity. The largest cell likely to fit would be around 8⨉40⨉50 mm, giving a capacity of approx 3.6 Ah. These cells are significantly more expensive however (around $10 per cell giving about $40 for a 2⨉2 pack).
It's probably possible to fit 4⨉14500 for a 2⨉2 configuration here as well, capacity will be lower but cheaper.
Solution cost was around $22 for 5 cells at 1200 mAh.
CM-7, large battery
I haven't actually built any of these yet; there's plenty of room for 3⨉18650 to give a 11.1 V pack with up to around 3.8 Ah.
Some fairly huge Li-Po cells could also be stuffed in here for enormous standby time, but cost per pack would be pretty high.
My CM-7 packs don't have the rifled area in the shell so machining the charge connector slot will be slightly less trivial (i.e. will actually have to measure instead of just eyeballing it).