Repairing Icom IC-V200T Front Panel Plastic Screw Holes
I try an epoxy technique to repair the front panel attachment points in the Icom IC-V200T.
The IC-V200T was a popular police radio in Norway, and many are available. Careless handling by someone along the chain of ownership caused mine to break all the front panel attachment points.
This technique can probably be applied to a number of radios from this era.
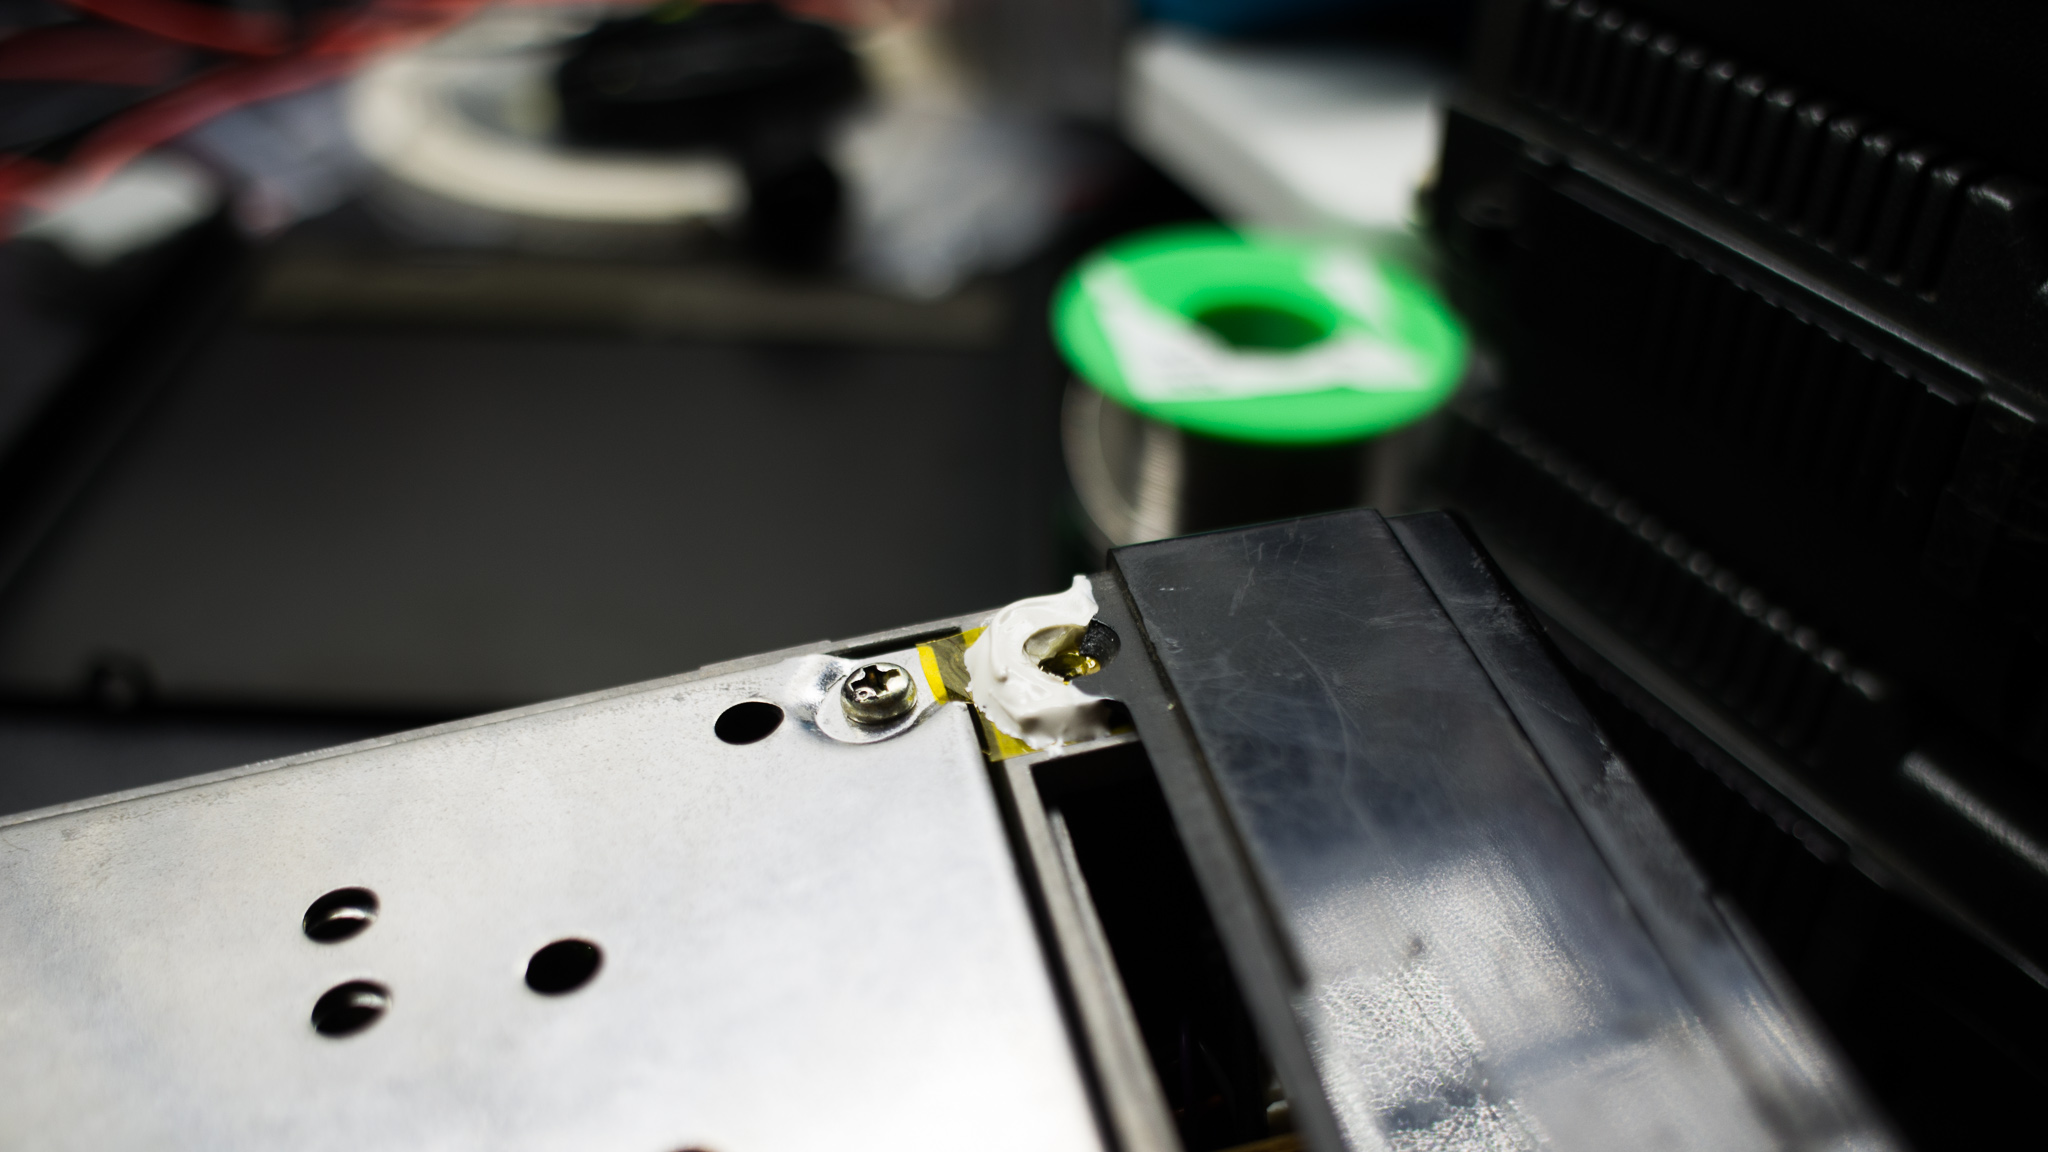
The front panel is attached using DIN7991 countersunk screws (M3⨉6-12; 3 in total), the attachment is part of the plastic front panel assembly. All three of mine were broken.
The mic connector is held in place with a M3⨉16-20 mm DIN7991 counter sunk screw.
To repair it I used some generic epoxy resin (Biltema Power Epoxy), and a masking technique to prevent the epoxy from attaching to the screw or the main frame.
3M DP490 would be ideal for this since it's black and extremely strong. It's pretty expensive though.
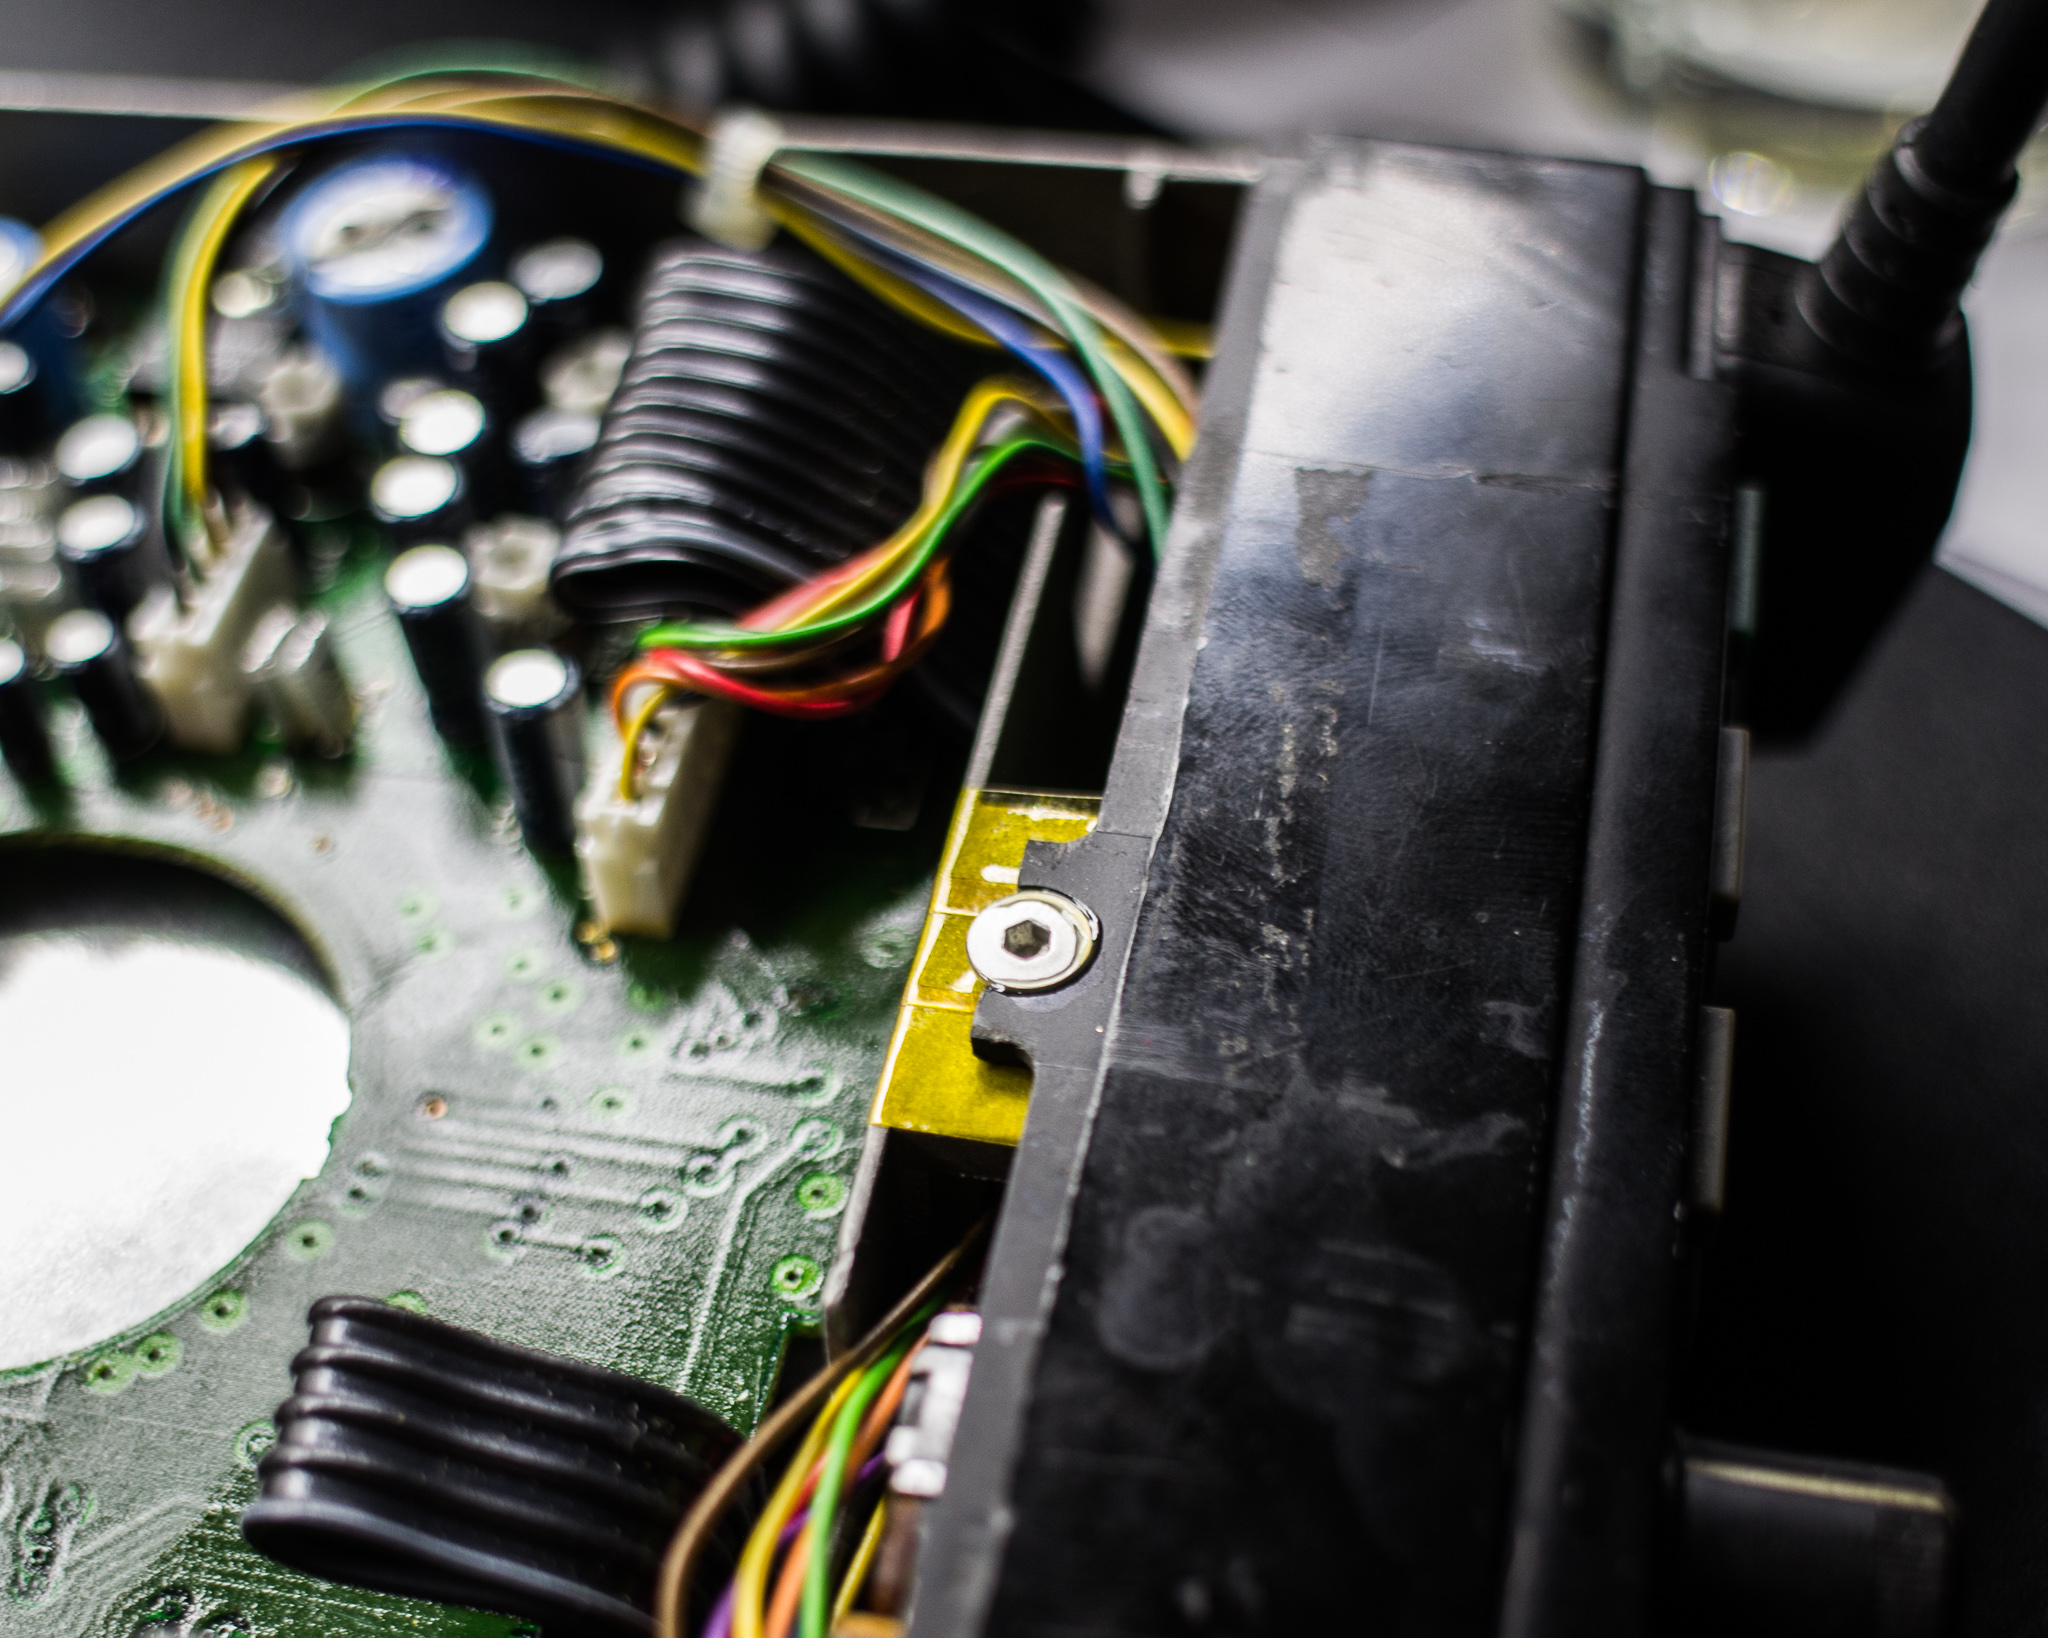
Along the metal of the main frame, kapton tape was applied, making sure it went over the edges front and back.
The screw head is covered in lithium grease, but any kind of grease coating will work. Make sure to get some grease on the top of the head as well as the sides.
Use a scalpel to cut a hole in the kapton where the screw enters.
The front panel is held in place with duct tape along the sides to keep it stable for the first hour or two until the resin is slightly hard.
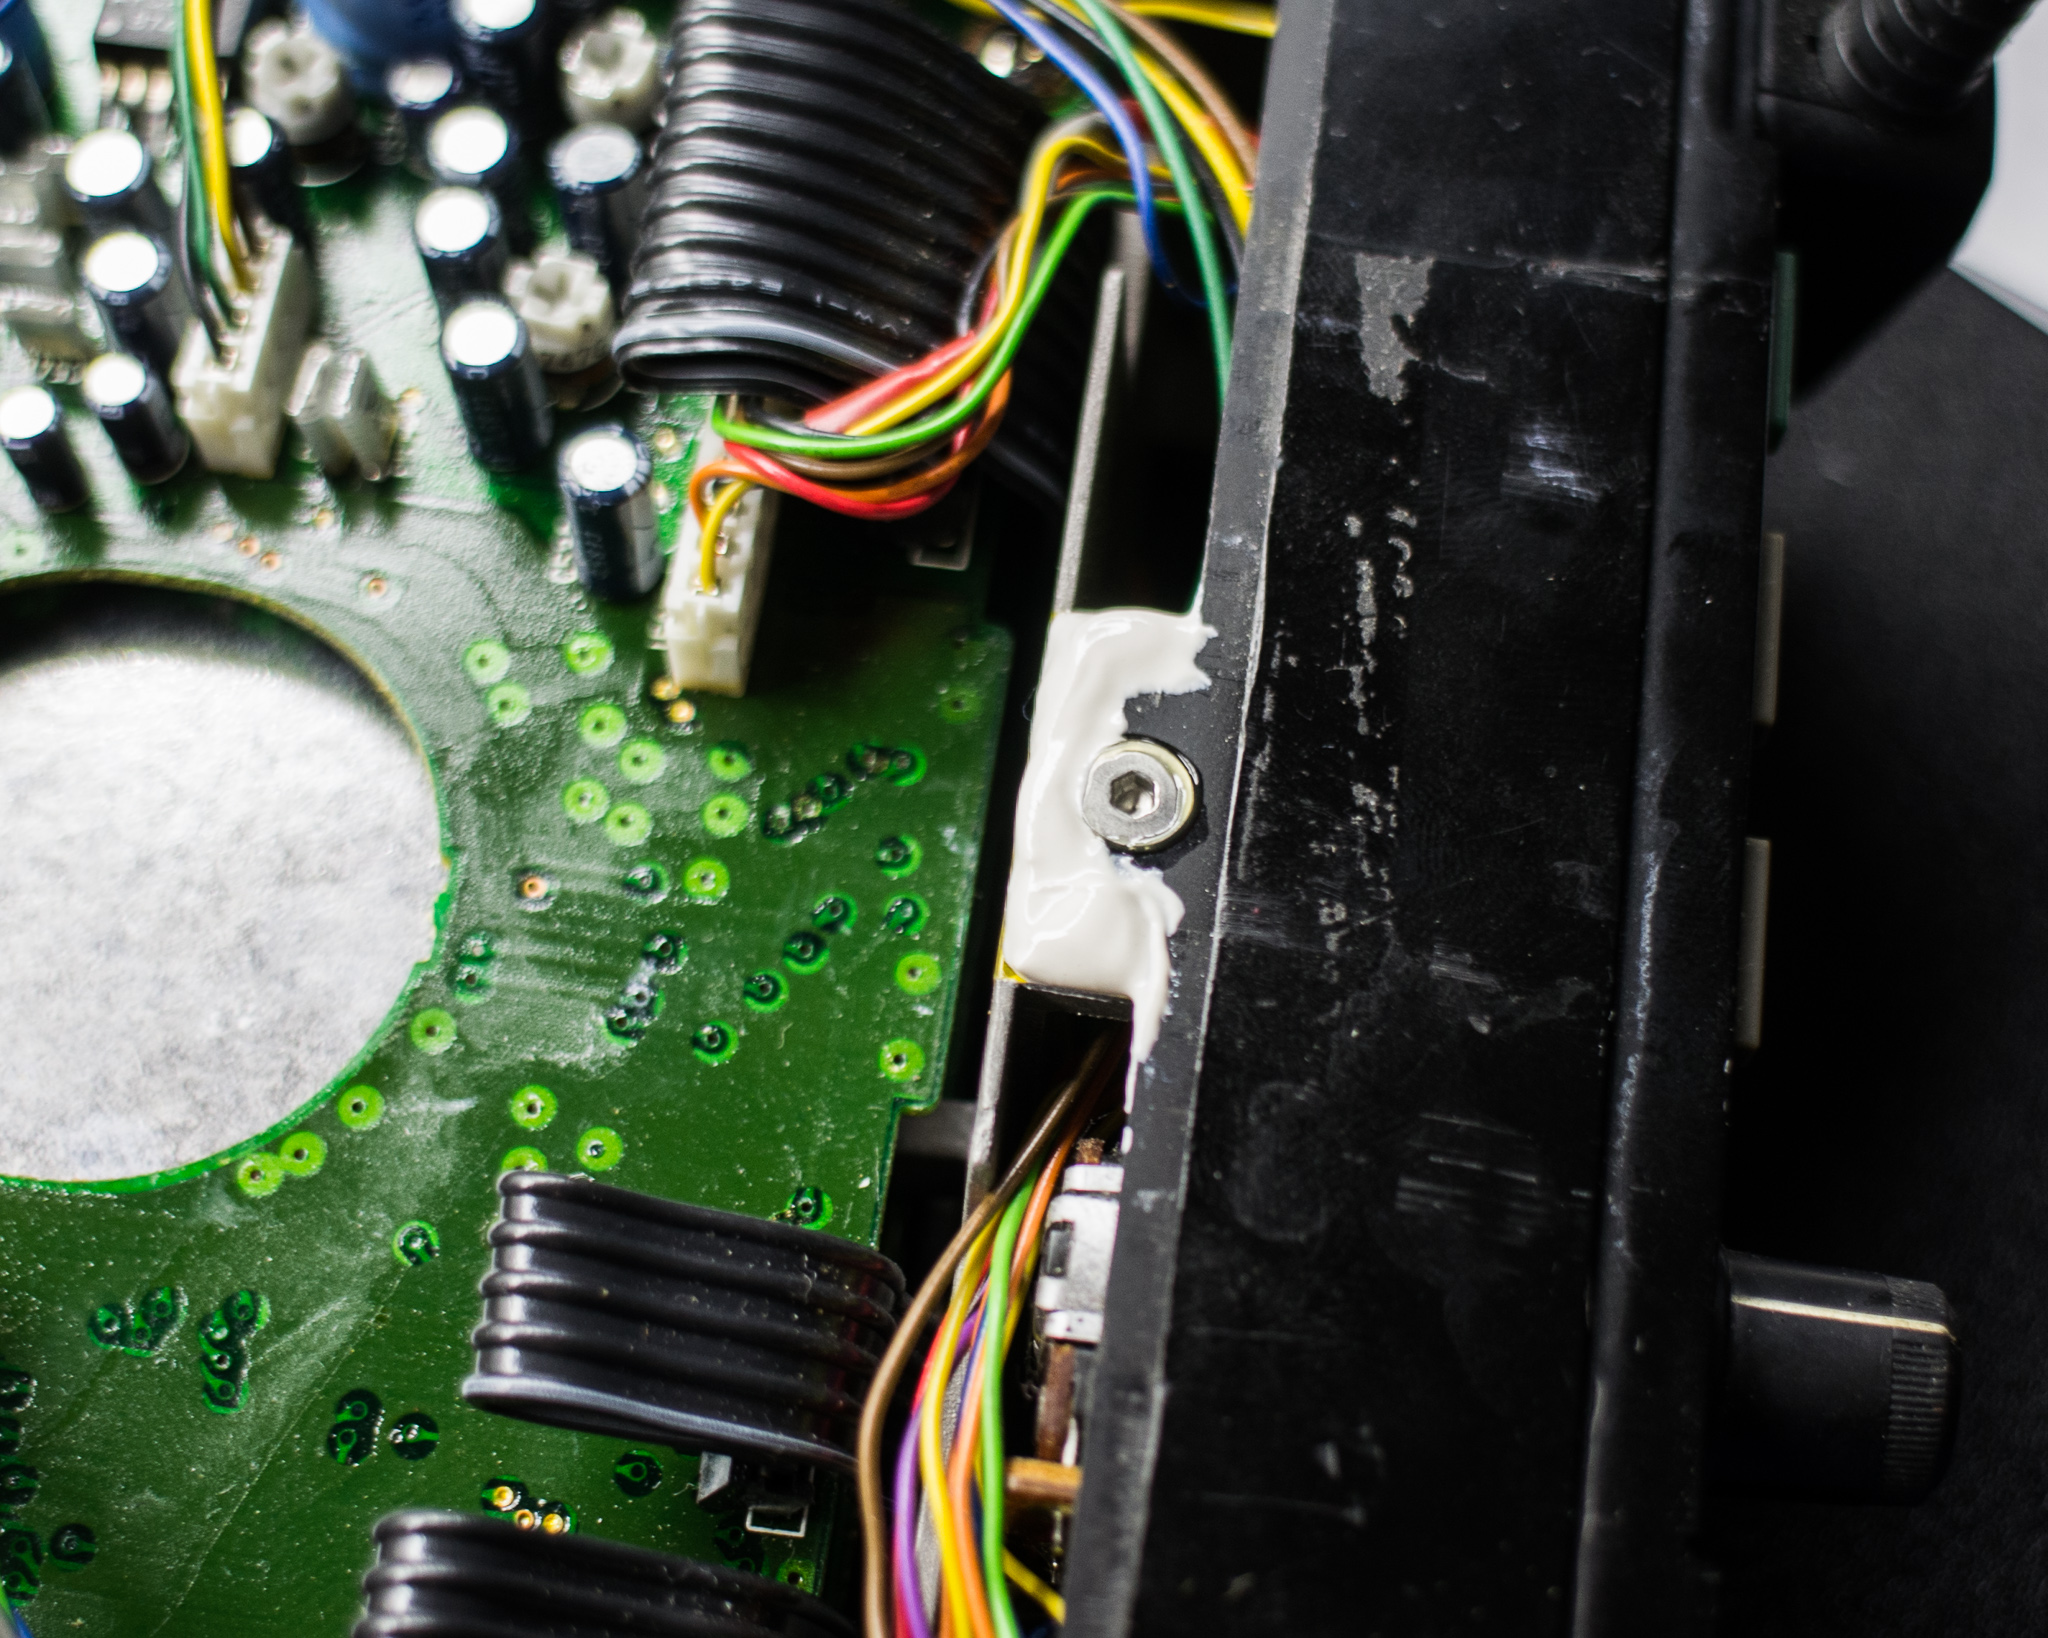
After applying the epoxy, leave it alone until the epoxy can be handled. Make sure the epoxy is attached to the front panel over the largest area possible to get the highest strength.
At that point, any areas where the epoxy shouldn't attach can be cut off using a sharp blade since the epoxy will be somewhat flexible. It's also a good idea to unscrew the screw at that point to make doubly sure it won't be glued in place.

Time will tell how reliable this is, but for light duty use it should be sufficient.
To loosen the tape I used a thin scalpel blade to cut the tape excess and pushed it in to break the tape glue, after that it was left alone for final curing.